Blog
How to Upgrade BMW 5 Series G60 Center Console to 7-Series Crystal Luxury
How to Upgrade BMW 5 Series G60 Center Console to 7-Series Crystal Luxury
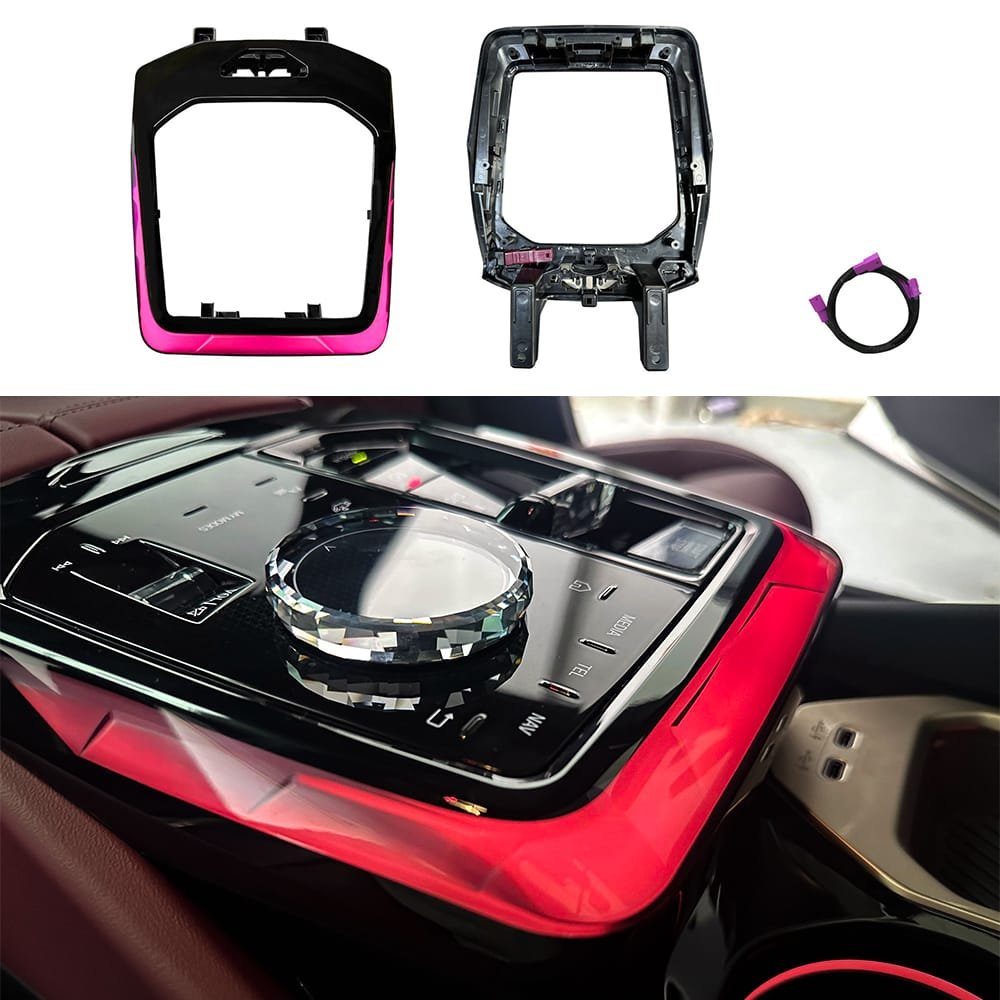
If you want to enhance your cabin, learning how to upgrade the BMW 5 Series G60 Center Console to a premium crystal finish is the ultimate interior transformation. While the new generation G60 Sedan / G68 Long Wheelbase and the all-electric BMW i5 come equipped with the stunning BMW Interaction Bar, many factory models leave the center gear selector area feeling incomplete with matte plastic or plain wood trim. Upgrading to the OEM+ style Crystal Console Trim Mold with Dynamic Ambient Lighting (LIN Bus Solution) bridges this gap, bringing that high-end 7-Series luxury directly into your cabin.
In this comprehensive DIY guide, we will walk you through the step-by-step disassembly and installation process to seamless integrate this ambient lighting upgrade into your vehicle.
Upgrade Essentials
- Product Link: LED Center Console Ambient Light For BMW 5 Series G60 G68 Upgrade
- Fitment: 2024, 2025, 2026 BMW 5 Series (G60 / G68) & i5
- Control Method: Original Factory iDrive Menu System (LIN Protocol)
- Installation Type: Plug-and-Play (No wire cutting, No coding required)
Required Tools & Preparation
- T20 Torx Screwdriver
- Plastic Interior Trim Pry Tool
- Microfiber Towel (to prevent scratching premium leather)
Step-by-Step Installation Tutorial
Phase 1: BMW 5 Series G60 Center Console Panel Removal
- Remove the Armrest Box Screws: Open the split-opening center armrest storage compartment. Locate and remove the two T20 Torx screws at the very bottom of the storage bin.
- Extract the Inner Storage Bin: Gently lift and pull out the inner plastic storage liner. Crucial Step: Do not yank it completely out immediately. Once lifted slightly, reach underneath to unplug the cigarette lighter connector and the armrest compartment light plug.
- Release the Console Rear Screws: With the inner liner removed, you will expose two additional T20 console screws located at the rear base of the center console panel. Remove them.
- Detach the Main Console Panel: Insert your plastic pry tool under the edge of the large glossy panel to prop it up. Gently push the entire panel forward (towards the dashboard) to slide it out of its locking slots. Lift the loose panel and unplug all remaining electrical connectors from the underside before removing it completely from the vehicle.
Phase 2: Disassembling the Gear Selector Panel
- Separate the Outer Trim Frame: Place the console panel face-down on a soft workspace. Remove the four T20 screws securing the outer decorative frame, then lift the frame off.
- Unseat the Gear Selector Shift Module: Locate the five T20 screws holding the core shift panel in place (two on each side, one in the middle). Once unscrewed, flip the panel over and use your pry tool to gently release the clips around all four corners of the base until the module pops up.
- Swap the Armrest Release Button: Flip the factory shift panel over. Remove the rubber band securing the physical armrest release button. Locate the two small access holes containing plastic clips/hooks. Press the hooks inward on both sides simultaneously and push backward to release the button.
- Assemble the New Crystal Frame: Take your new Crystal Ambient Light Console Trim Mold. Align the original armrest release button into its designated slot and press firmly until it clicks into place. Rehook the rubber band and test the button to ensure smooth, responsive physical feedback.
Phase 3: Plug-and-Play Harness Routing (LIN Solution)
- Connect the Ambient Light Adapter Harness: Before securing any panels back down, plug the dedicated end of the product's adapter harness into the new crystal trim's ambient light LED socket. Ensure it snaps in tightly.
- Route the Wire Harness: Guide the wire harness straight out through the pre-existing gap on the side of the module panel. Ensure the route is clear so the wire will not get pinched, blocked, or cut when reassembling the console layers.
- Resecure the Shift Module: Place the shift module back into its position, locking down the 5 T20 screws, and snap the outer frame back on using its 4 T20 screws.
Phase 4: BMW 5 Series G60 Center Console Power Testing & Final Reassembly
- T-Harness Intercept at Cup Holder Light: Bring the fully assembled console panel back into the car. Locate the original factory cup holder ambient light plug at the front of the center stack. Unplug it and insert our Plug-and-Play T-Harness directly between the factory car harness and the cup holder light to seamlessly grab the power and LIN bus communication signals. Re-install the wire retaining clips.
- The Sync Test: Turn on the car’s accessory power (without starting the engine). Open the iDrive system menu, navigate to Interior Lighting, and cycle through different color profiles. The new crystal console trim should perfectly sync with your factory ambient lights in brightness, color, and dynamic breath effects.
- Final Panel Lock-Down: Once the lighting test passes, realign the entire BMW 5 Series G60 Center Console assembly into its cradle and slide it backward (towards the rear seats) to lock it into its retaining slots. Re-install the rear screws, plug the armrest inner bin components back in, and tighten down the final two T20 screws inside the armrest box.
Frequently Asked Questions (FAQ)
1. Will upgrading the BMW 5 Series G60 Center Console void my factory warranty?
No. This modification utilizes a completely plug-and-play T-harness intercept that communicates using the OEM LIN protocol. There is no wire splicing, cutting, or physical ECU altering involved, making it fully reversible.
2. Do I need to code the car using Esys, Bimmercode, or ISTA?
No coding is required. Because this upgrade ties directly into the factory cup holder ambient lighting circuit via the LIN bus, the car instantly recognizes the hardware as an extension of the factory system. It maps natively to your official BMW iDrive color wheel controls.
3. Does the lighting support dynamic multi-color shifts?
Yes! It fully supports all dynamic interior lighting features across the BMW 5 Series G60 Center Console, meaning it will sync with driving modes (My Modes), flash red for open-door warnings, and pulse welcoming dynamic light paths upon unlocking the car.
Conclusion
Upgrading the BMW 5 Series G60 Center Console to the dynamic crystal look completely transforms the nighttime driving experience, giving it an undeniable 7-Series or XM flagship aura. If you are looking to purchase this exact premium crystal lighting kit with guaranteed fitment, click here to get your LED Center Console Ambient Light For BMW 5 Series G60 G68 Upgrade today, or contact our tech support team for direct global shipping options!